Introduction
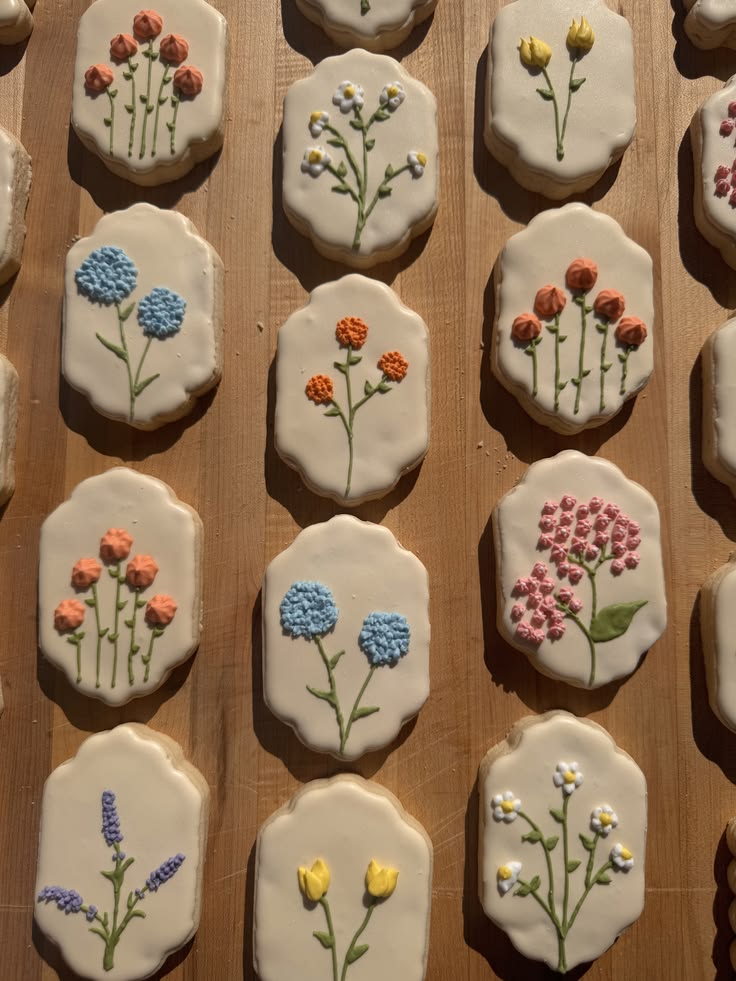
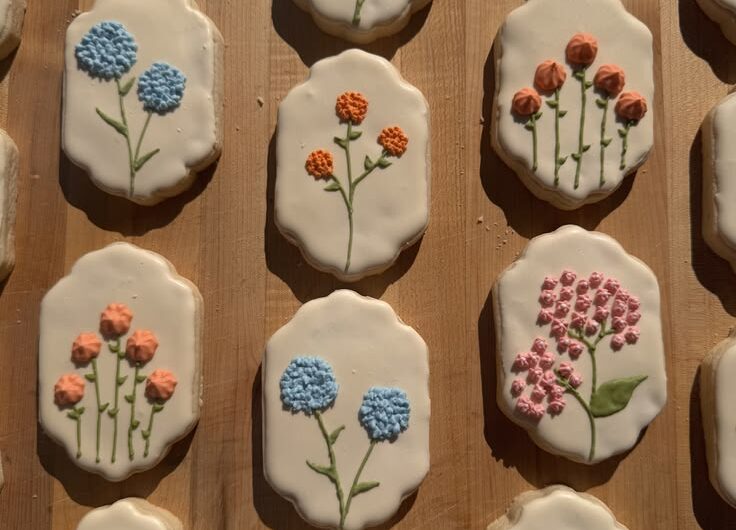
Want cookies that feel cheerful and a little special without spending all day baking? These spring cookies decorated with soft pastel icing and simple designs are exactly that kind of treat. They’re light, buttery, and just sweet enough to enjoy with tea or pack into a lunchbox. I usually make a batch on a quiet afternoon and decorate them slowly while the kitchen still smells warm and cozy. Whether it’s a small family gathering or just a relaxing weekend bake, these cookies bring a fresh, homemade touch that feels easy and comforting.
Why You Will Love This Recipe
Looking for a simple bake that still feels creative and fun? These spring cookies decorated are perfect when you want something pretty but not complicated. The dough comes together easily, and the decorating can be as simple or detailed as you like. You don’t need fancy tools—just a spoon, a small bowl, and a bit of patience.
These cookies are soft in the center with slightly crisp edges, making them great for both kids and adults. They store well, so you can bake ahead and decorate later. If you’re cooking on a budget, the ingredients are basic pantry staples. Plus, they’re freezer-friendly, which makes them ideal for planning ahead. It’s the kind of recipe you’ll want to save and come back to whenever spring rolls around.
Ingredients
Tip: Use good-quality butter for a richer flavor and softer texture.
- 2 ½ cups all-purpose flour
- 1 cup unsalted butter (softened)
- ¾ cup sugar
- 1 egg
- 1 tsp vanilla extract
- ½ tsp baking powder
- ¼ tsp salt
For icing:
- 1 ½ cups powdered sugar
- 2–3 tbsp milk
- Food coloring (pastel shades)
For 2 people: simply halve all ingredients. For more than 4 people, double or triple the amounts as needed.
Instructions
Step 1: Preparation – 40 words
Start by mixing softened butter and sugar until it looks light and fluffy. Add the egg and vanilla, then gently mix again. In another bowl, combine flour, baking powder, and salt before slowly adding into the wet mixture to form a soft dough.
Step 2: Main Cooking Process – 40 words
Roll the dough on a lightly floured surface until it’s about half an inch thick. Cut into simple shapes like circles or flowers. Place them on a lined baking tray, leaving a little space between each cookie before baking until edges turn lightly golden.
Step 3: Combining Ingredients – 40 words
While cookies cool completely, mix powdered sugar with milk until smooth and slightly thick. Divide into small bowls and add a drop of food coloring to each. Stir gently until you get soft pastel shades ready for decorating your cookies.
Step 4: Finishing & Final Simmer – 40 words
Spread or drizzle icing over cooled cookies using a spoon or small piping bag. Let them sit at room temperature until icing sets. If making fewer cookies for 2 people, baking time stays similar but trays will be smaller and easier to manage.
Why This Recipe Works for Busy Days
Need something you can prepare without stress? These cookies fit easily into a busy schedule because the dough can be made ahead and stored. You can bake one day and decorate the next. They also keep well, so you’re not rushing to finish everything at once.
Tips & Tricks
- Want smoother dough that’s easier to handle? Let it rest in the fridge for 20 minutes before rolling. Skipping this step can make the dough sticky. If making a smaller batch for 2 people, chilling time stays the same, but handling becomes quicker.
- Struggling with uneven baking? Make sure all cookies are the same thickness so they cook evenly. Thin edges can burn quickly. When scaling up for more than 4 people, bake in batches instead of overcrowding trays to keep results consistent.
- Finding icing too runny or too thick? Adjust slowly by adding a few drops of milk or a bit more sugar. For smaller batches, mix icing in tiny portions so you don’t waste it. For larger batches, prepare extra icing in advance.
- Want clean designs without mess? Let the base icing layer dry slightly before adding details. Rushing this step can cause colors to blend. When making more cookies, decorate in stages to keep things neat and manageable.
Variations
Meaty Version
Looking to make these more filling for a snack platter? You can serve these cookies alongside lightly sweetened cream cheese or even a mild honey glaze with crushed nuts. While not truly “meaty,” pairing with protein-rich sides balances sweetness, especially when serving larger groups.
Vegetarian Option
Wondering how to keep everything fully vegetarian? This recipe already fits well, but you can swap milk in the icing with plant-based milk like almond or oat. The flavor stays soft and pleasant, and it works perfectly whether you’re making a small or large batch.
Ingredient Swap
Out of butter or want a lighter option? You can use margarine or a mix of butter and oil, though the texture may be slightly softer. For 2 people, try small adjustments first. For bigger batches, stick closer to the original for consistent results.
Flavor or Herb Boost
Want to add a spring twist? Mix a little lemon zest or a drop of almond extract into the dough. It gives a fresh, light aroma that pairs beautifully with pastel icing. Adjust gently when making smaller batches so the flavor doesn’t overpower.
Serving Suggestions
- With Tea or Coffee
Thinking about a quiet afternoon treat? Serve these cookies with warm tea or coffee. The soft sweetness pairs beautifully with slightly bitter drinks. For smaller servings, plate just a few cookies, while for larger gatherings, arrange them on a tray for easy sharing. - Family Dessert Plate
Need something simple after dinner? Place a mix of decorated cookies on a plate with fresh fruit slices. It feels light yet satisfying. You can easily adjust the number of cookies depending on how many people you’re serving. - Kids’ Snack Time
Looking for something fun for kids? Let them pick their favorite decorated cookies as a snack. You can even involve them in decorating. For fewer kids, make smaller batches. For parties, double the recipe and offer different designs. - Gift or Sharing Box
Planning to share with neighbors or friends? Pack cookies in a small box or wrap them neatly. They travel well and look charming. Simply increase the recipe size to make enough for gifting without running short.
Storage Instructions
- Fridge Storage
Wondering how to keep cookies fresh longer? Store them in an airtight container in the fridge for up to 5 days. For smaller batches, use a compact container to avoid drying out. For larger batches, layer cookies with parchment paper. - Reheating
Want that fresh-baked feel again? Let cookies sit at room temperature for a few minutes before serving. Avoid microwaving as icing may melt. Smaller portions warm quickly, while larger batches should be taken out in stages. - Freezing
Planning ahead? You can freeze undecorated cookies for up to 2 months. Thaw them completely before adding icing. For 2 people, freeze small portions. For bigger batches, store in labeled bags for easy use later. - Make-Ahead Tips
Short on time during the day? Prepare dough the night before and refrigerate. You can also bake cookies ahead and decorate the next day. This works well for both small and large servings without changing the recipe steps.
Recipe Timing
Prep Time: 20 minutes
Cook Time: 12 minutes
Rest Time: 20 minutes
Total Time: 52 minutes
Nutrition Information (Approximate)
Per serving (about 2–3 cookies):
Calories: 180–220
Protein: 2–3g
Contains small amounts of calcium and iron. Values are estimates and may vary depending on ingredients used and portion sizes.
FAQs
Can I make these cookies ahead of time?
Yes, you can bake them a day or two earlier and decorate later.
Why did my cookies spread too much?
The dough may be too warm—chill it before baking.
Can I use a different flour?
All-purpose works best, but a gluten-free blend can be tried.
Why is my icing not setting?
It may be too thin—add more powdered sugar.
How should I store leftover cookies?
Keep them in an airtight container in the fridge.
Can I adjust sweetness?
Yes, reduce sugar slightly or use less icing, especially for smaller batches.
Conclusion
Want a simple bake that still feels thoughtful and fun? These spring cookies decorated bring a soft, homemade charm to your kitchen without needing complicated steps. You can keep them simple or get creative with colors and designs depending on your mood. They’re easy to adjust for small family moments or bigger gatherings, which makes them a recipe worth saving. Once you try them, you’ll likely come back to them every spring, adding your own little twist each time.
Recipe Card
Spring Cookies Decorated
4
servings20
minutes12
minutes200
kcalSoft, buttery cookies topped with light pastel icing. Easy to make, fun to decorate, and perfect for sharing with family or friends.
Ingredients
2 ½ cups all-purpose flour
1 cup unsalted butter (softened)
¾ cup sugar
1 tsp vanilla extract
½ tsp baking powder
¼ tsp salt
1 ½ cups powdered sugar
2–3 tbsp milk
Food coloring
For 2 people: halve ingredients. For more than 4: double or increase as needed.
Directions
- Mix butter and sugar until soft and fluffy. Add egg and vanilla, then mix again.
- In another bowl, combine flour, baking powder, and salt. Slowly mix into wet ingredients to form dough.
- Roll dough, cut shapes, and bake at 180°C (350°F) until edges are lightly golden.
- Let cookies cool completely.
- Mix icing ingredients until smooth and color as desired.
- Decorate cookies and let icing set before serving.
- Enjoy your homemade spring cookies!